Pinterest: A Photographer’s Guide

Contributor Articles

Are you using Pinterest to boost your photography business? What are you waiting for! As a photographer, Pinterest is a treasure trove and possibly the best return on investment of any social media platform for your business/website. You will need to put in a little legwork at first, but then I promise things will flow. The great thing about Pinterest is that compared to Facebook and Instagram, the pins are long lived and can reap the benefits for years. However, you won’t necessarily see results right away and it may take a few months of using the platform consistently to see the rewards of all the work you’ve put in. So don’t get discouraged, a pin can go viral years after you first posted it!
Here are a few statistics to get you pumped: did you know that most Pinterest users spend on average 15 minutes browsing once they login? That is is just 5 minutes less than on Facebook. Also, Pinterest is the second highest traffic generator on the web after Facebook. Crazy right? One image pinned on Pinterest usually generates on average 6 visits/clicks to your website. These clicks might take a while and won’t happen overnight but that is still amazing. You have all these wonderful images already, what do you loose by adding them to a board and getting traffic from them?  Also, contrary to other social media platforms Pinterest is the only one that gets referenced on Google. This means that when people search for things on Google or Google images, pins will show up in the Google search results. Also, the more pins are being shared from your website, the better it is for your SEO and the better they will perform on Pinterest too. Just keep in mind that as with any other social media platforms, the more time you spend on it the better the results you will get. So how do you optimize your pins and your account for the best results possible? Let’s see…
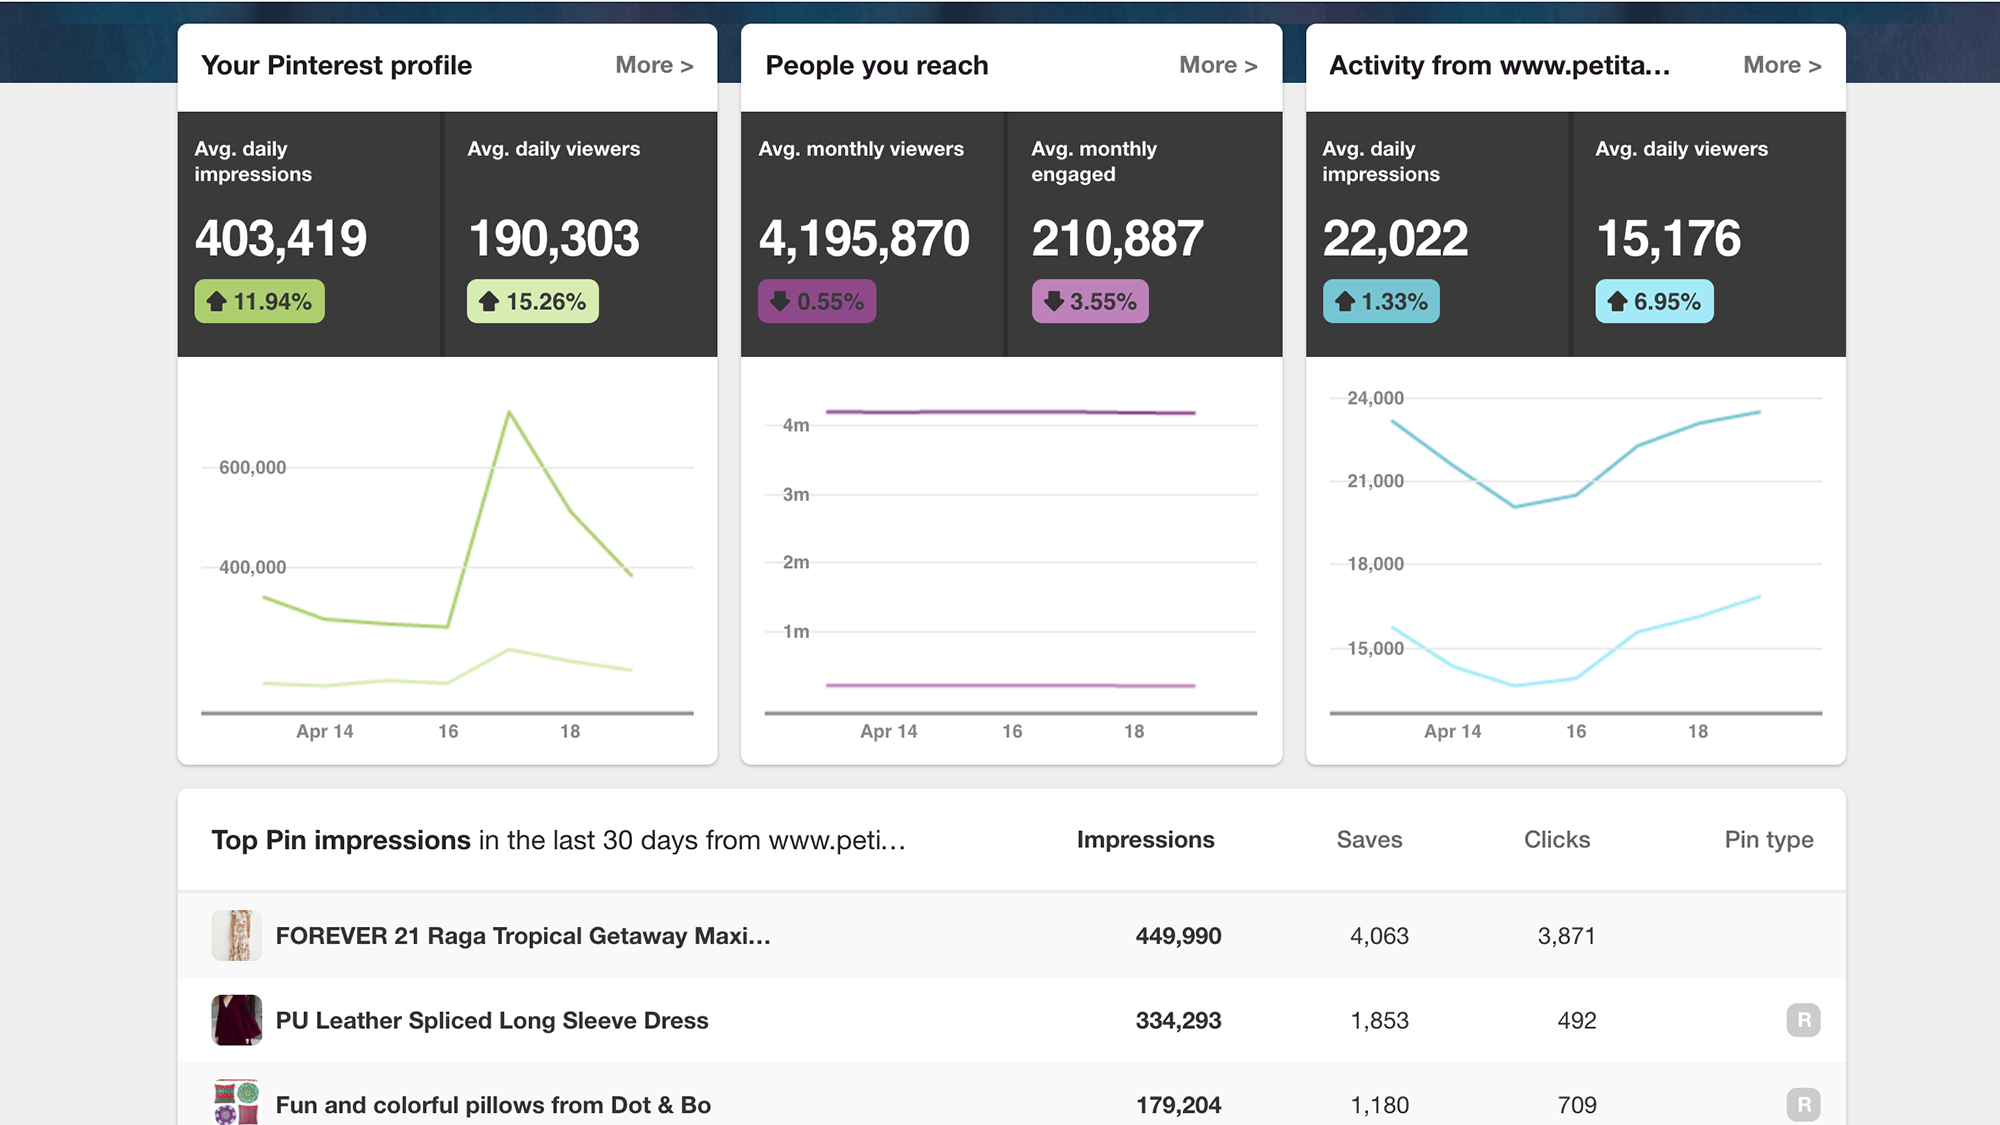
The first thing you will want to do is set up a business account. This will give you access to analytics and rich pins. The analytics give a wealth of information such as who your pins reach, what their demographics and their interests are, which are your best-performing pins, what brands your audience engages with, etc. Which will, in turn, give you a good idea of the types of pins to create and post.
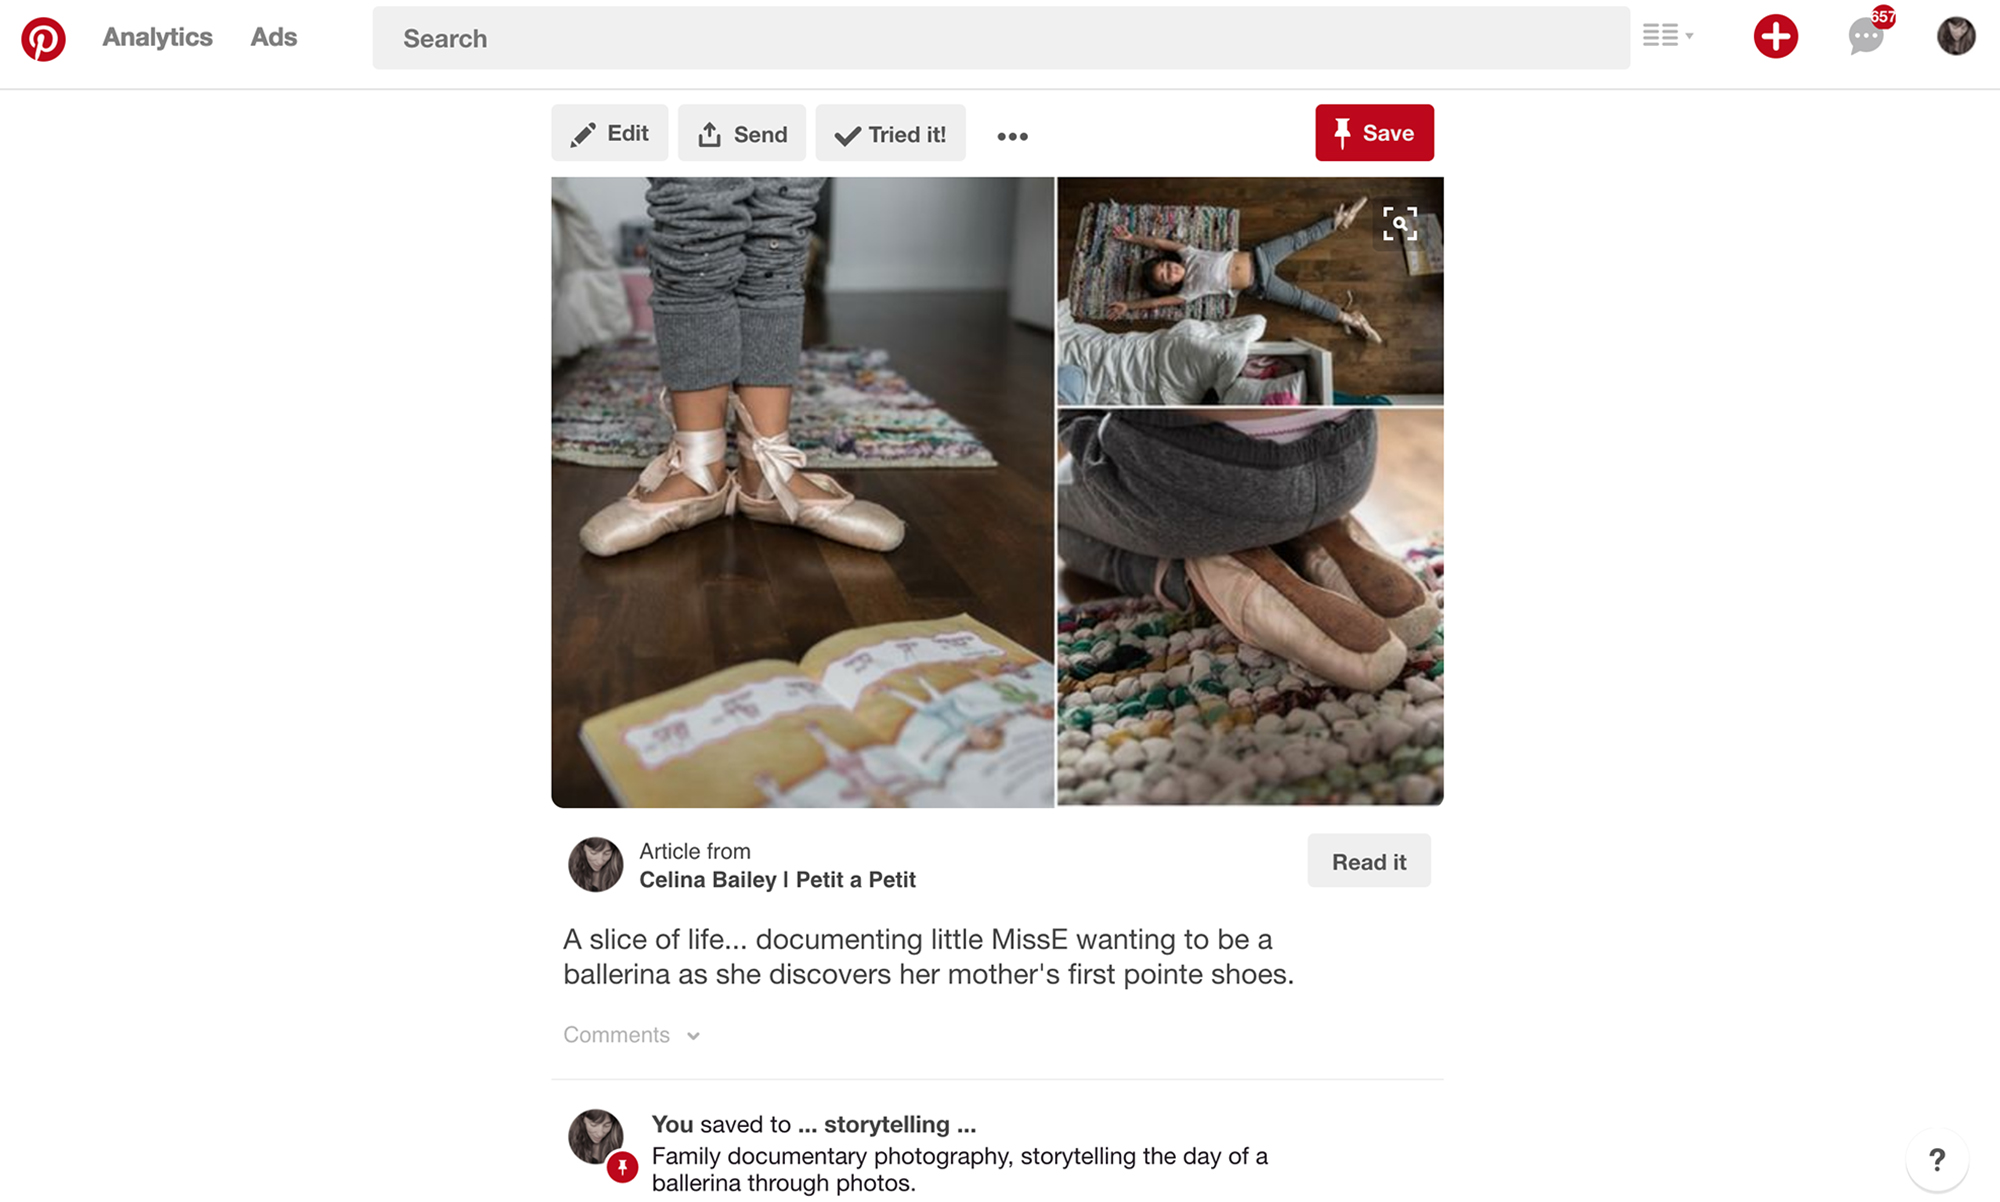
Another advantage of having a business account is access to Rich Pins. Rich pins generally perform better since they provided added search words and descriptions to your pins. You can read more about how to install them and what they are here. Why is this important? Simply because not only is Pinterest a platform to share images but it is also a search engine of its own with over 2 billion searches being made every month. If you have rich pins, Pinterest will automatically add the metadata that you have already included on your website to your pins. Then you can use even more descriptive words to your caption that are different from those you’ve included in your metadata furthering, the possibilities of being found through a search. Now just like for your metadata you don’t want to be putting keywords one after another, but instead, you want to formulate a cohesive sentence that includes your keywords. To help you, think about what someone would type to find a photographer and include that in your caption. Having Rich Pins also means your pins look more professional, your logo and a call to action button appears with your pins automatically.

Since Pinterest’s algorithm relies so heavily on keywords for their search engine, not only is having good images key but proper wording too. This means that when setting up your account, you will want to make sure your bio has key search words and describes who and what you do clearly. You will want to make sure that all your boards have a title that says exactly what the board is about, again think in terms of search words. Make sure you give your boards a good description and don’t forget to put in a specific category provided by Pinterest. Lastly, you will want to make sure that the captions that go with your pins are descriptive and packed with keywords yet again.
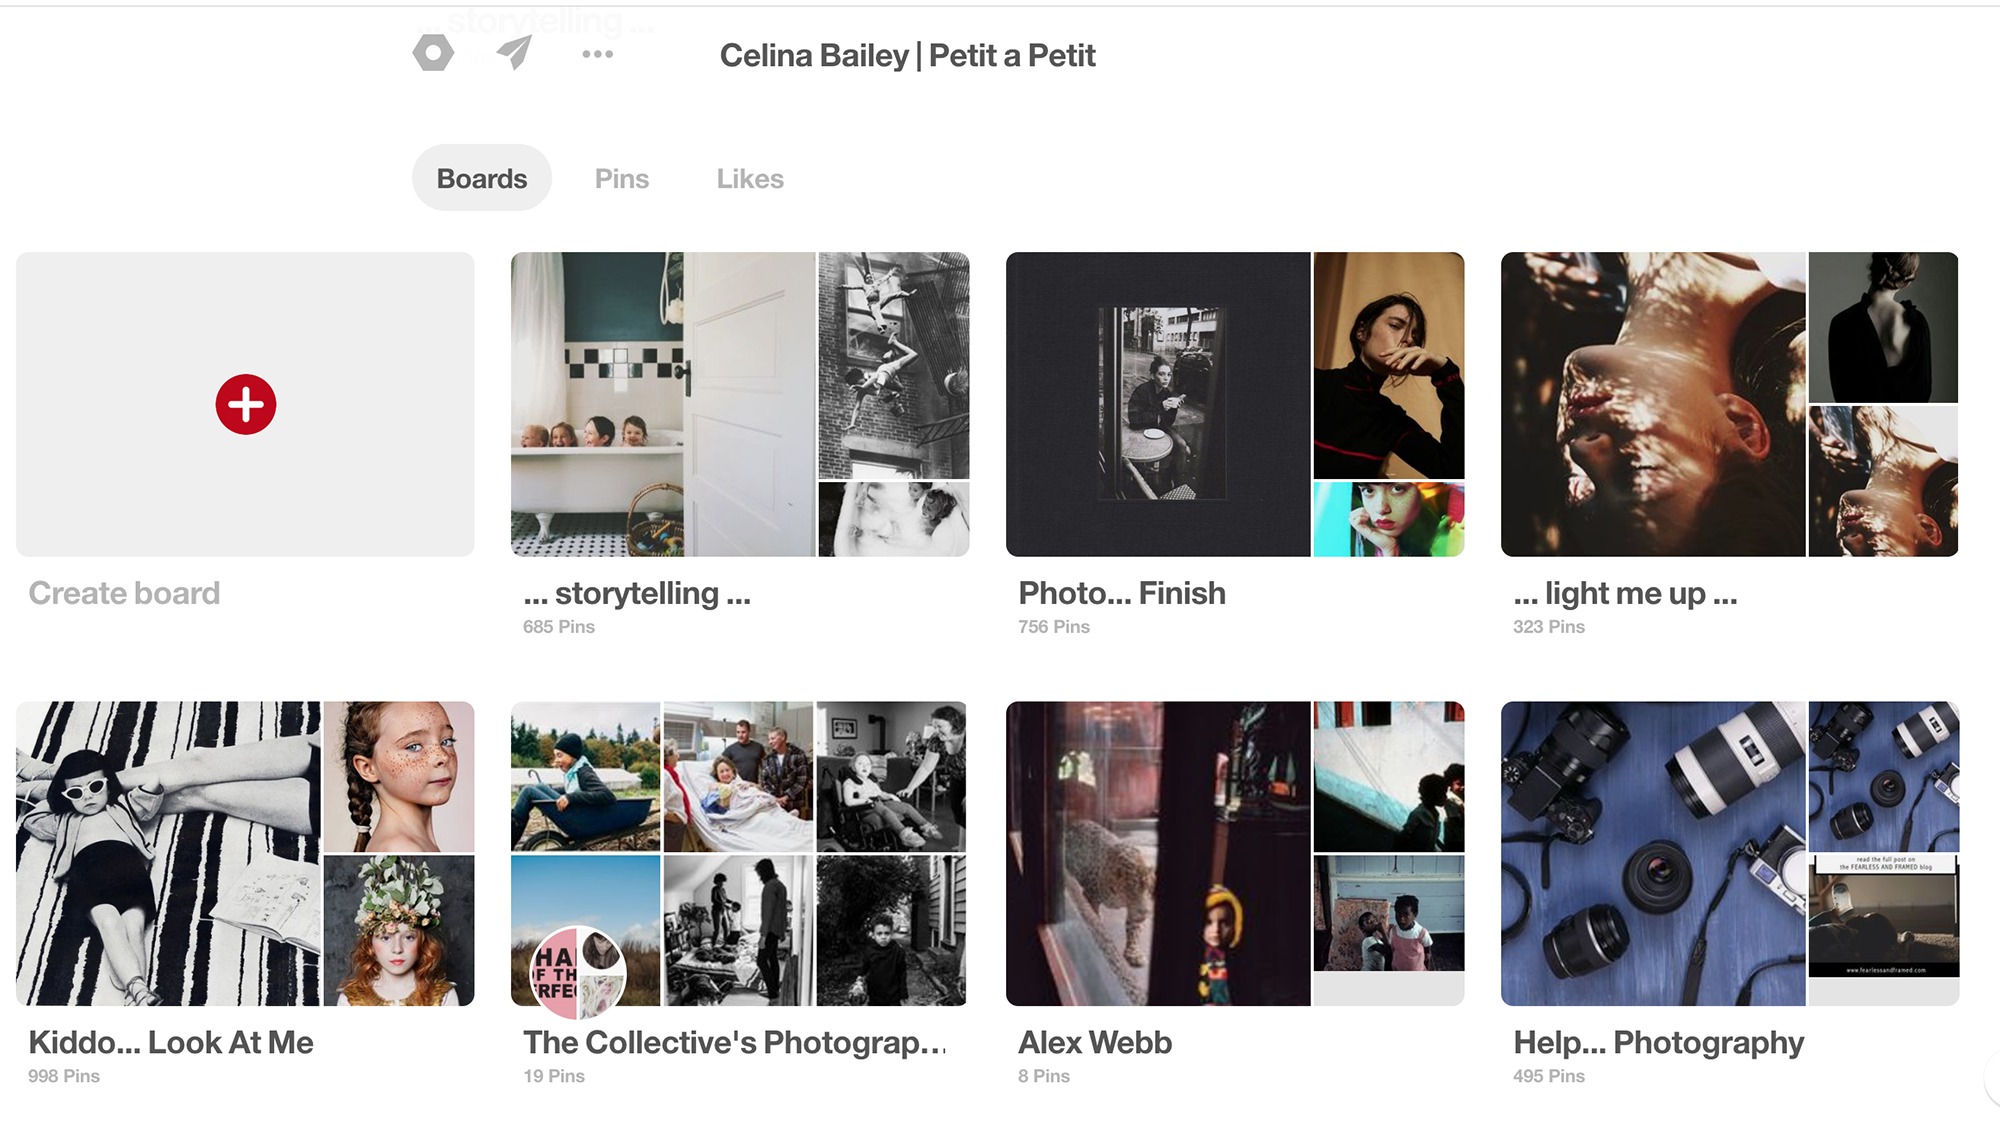
Now, let’s ask a few questions. What do you want from Pinterest? Who is our target market? Good chances are that you want to generate some traffic to your website and eventually get a few sessions booked, sell prints or seats to a workshop or perhaps grow your Instagram following. If you are reading this, then you are probably a documentary family photographer; so your target market is most likely moms with kids. This mom is maybe also a photographer or someone who is into the arts, probably a creative and someone who appreciates good photography. She values connections over aesthetics but still likes pretty things. Write all of these things down and do a proper analysis of who your clientele is. So why is she using Pinterest? Most probably to get inspired, but also to inform and educate herself. So now you need to think about what inspires your client, what type of information are they looking for on Pinterest and take more notes. A great way to find this out is to search for your clientele (type in former clients names in the search tool or maybe some of your Facebook or Instagram followers) and check out their profiles on Pinterest. See who they are following, who is following them back and get a feel for who they are. What are their interests and their hobbies? So now that you know all this, creating an account that appeals to them will be that much easier. Also, keep in mind that if they like you as a photographer, they are going to want to follow you to see what it is that inspires you and what your likes and aesthetics are too.
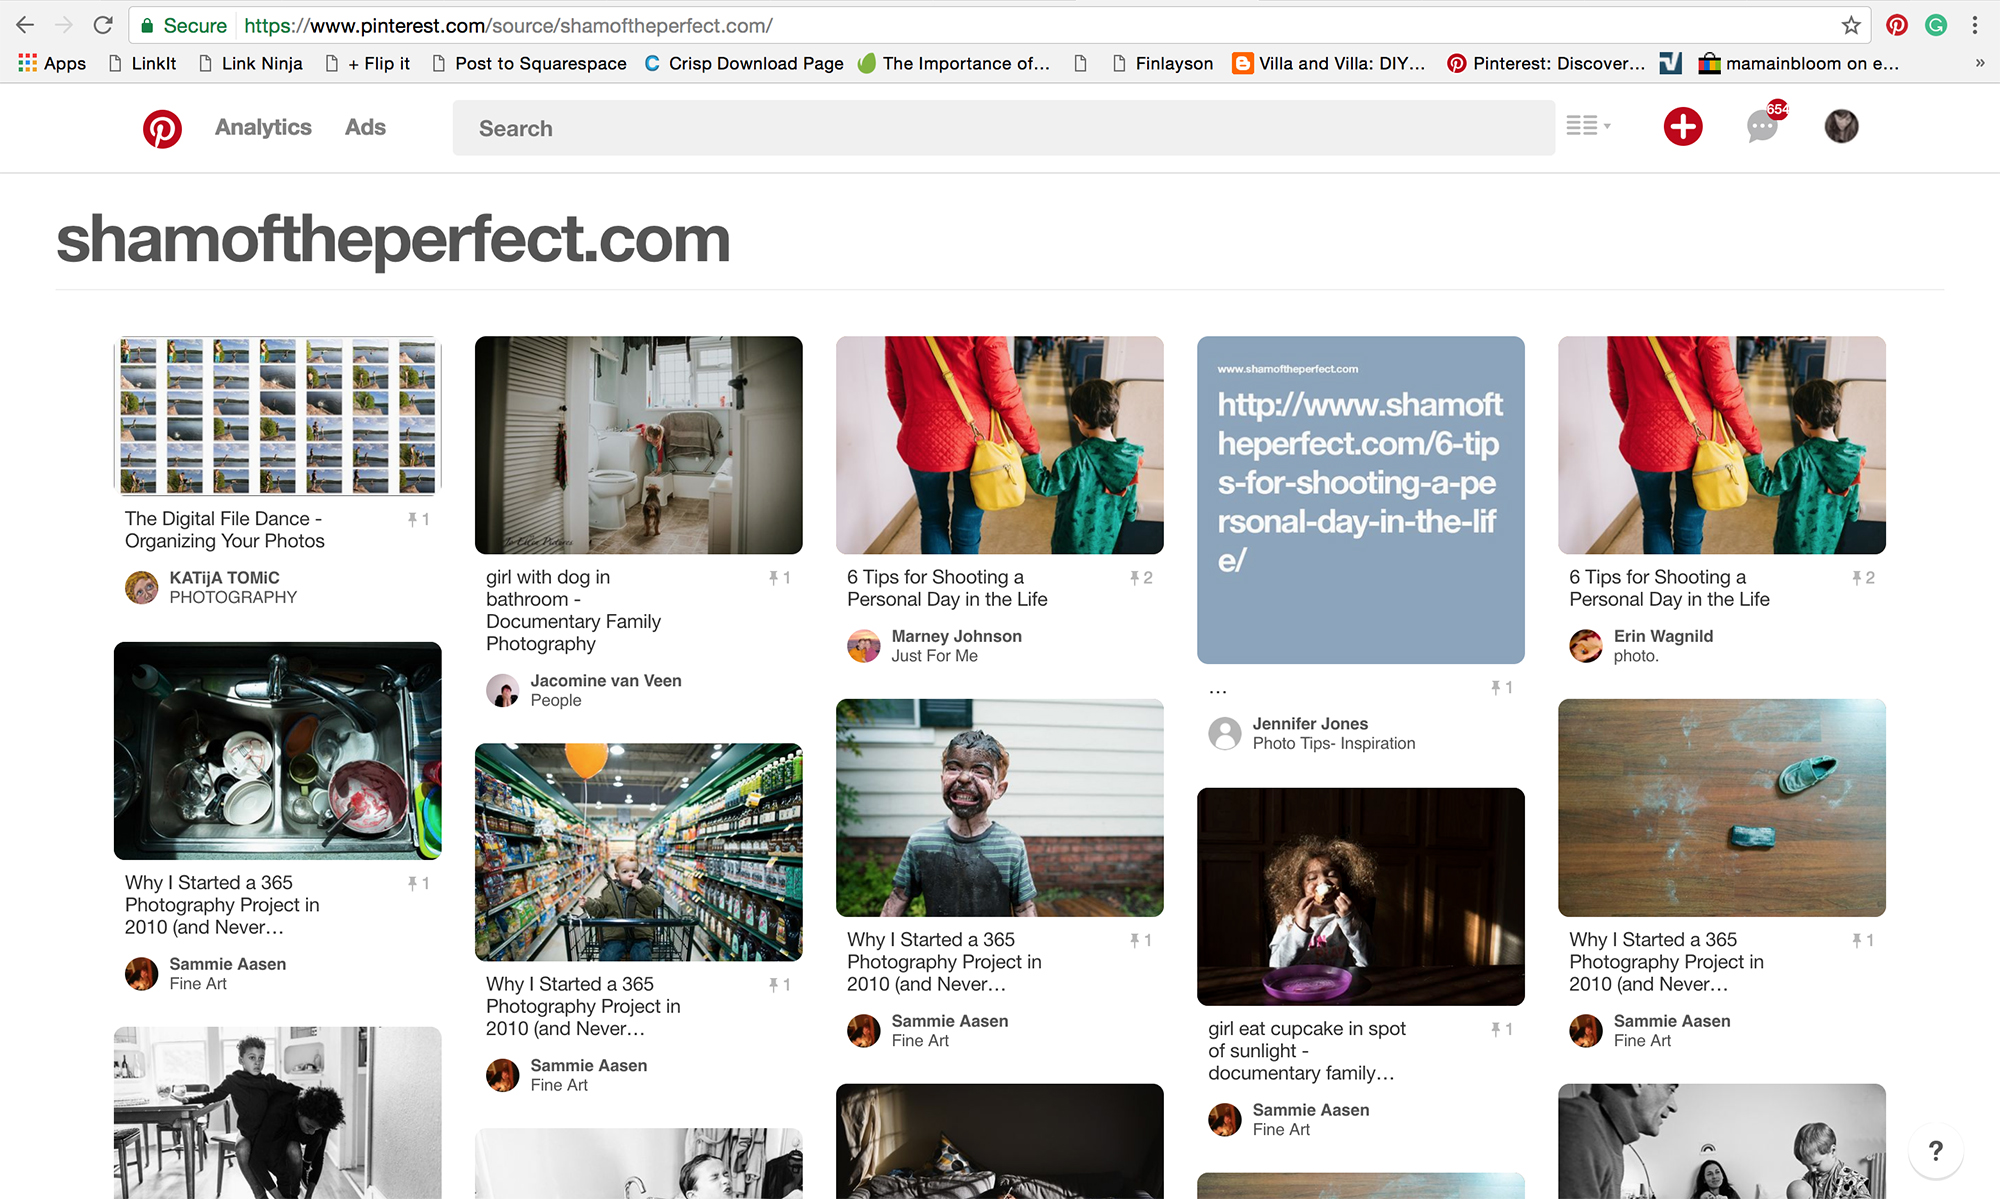
If you want to see who and what is being pinned from your site you can check by entering the following Url: pinterest.com/source/YOURWEBSITE.com This way you can see who is liking and sharing your work. This is a great way to also engage by commenting on these pins and perhaps start following the pinners.

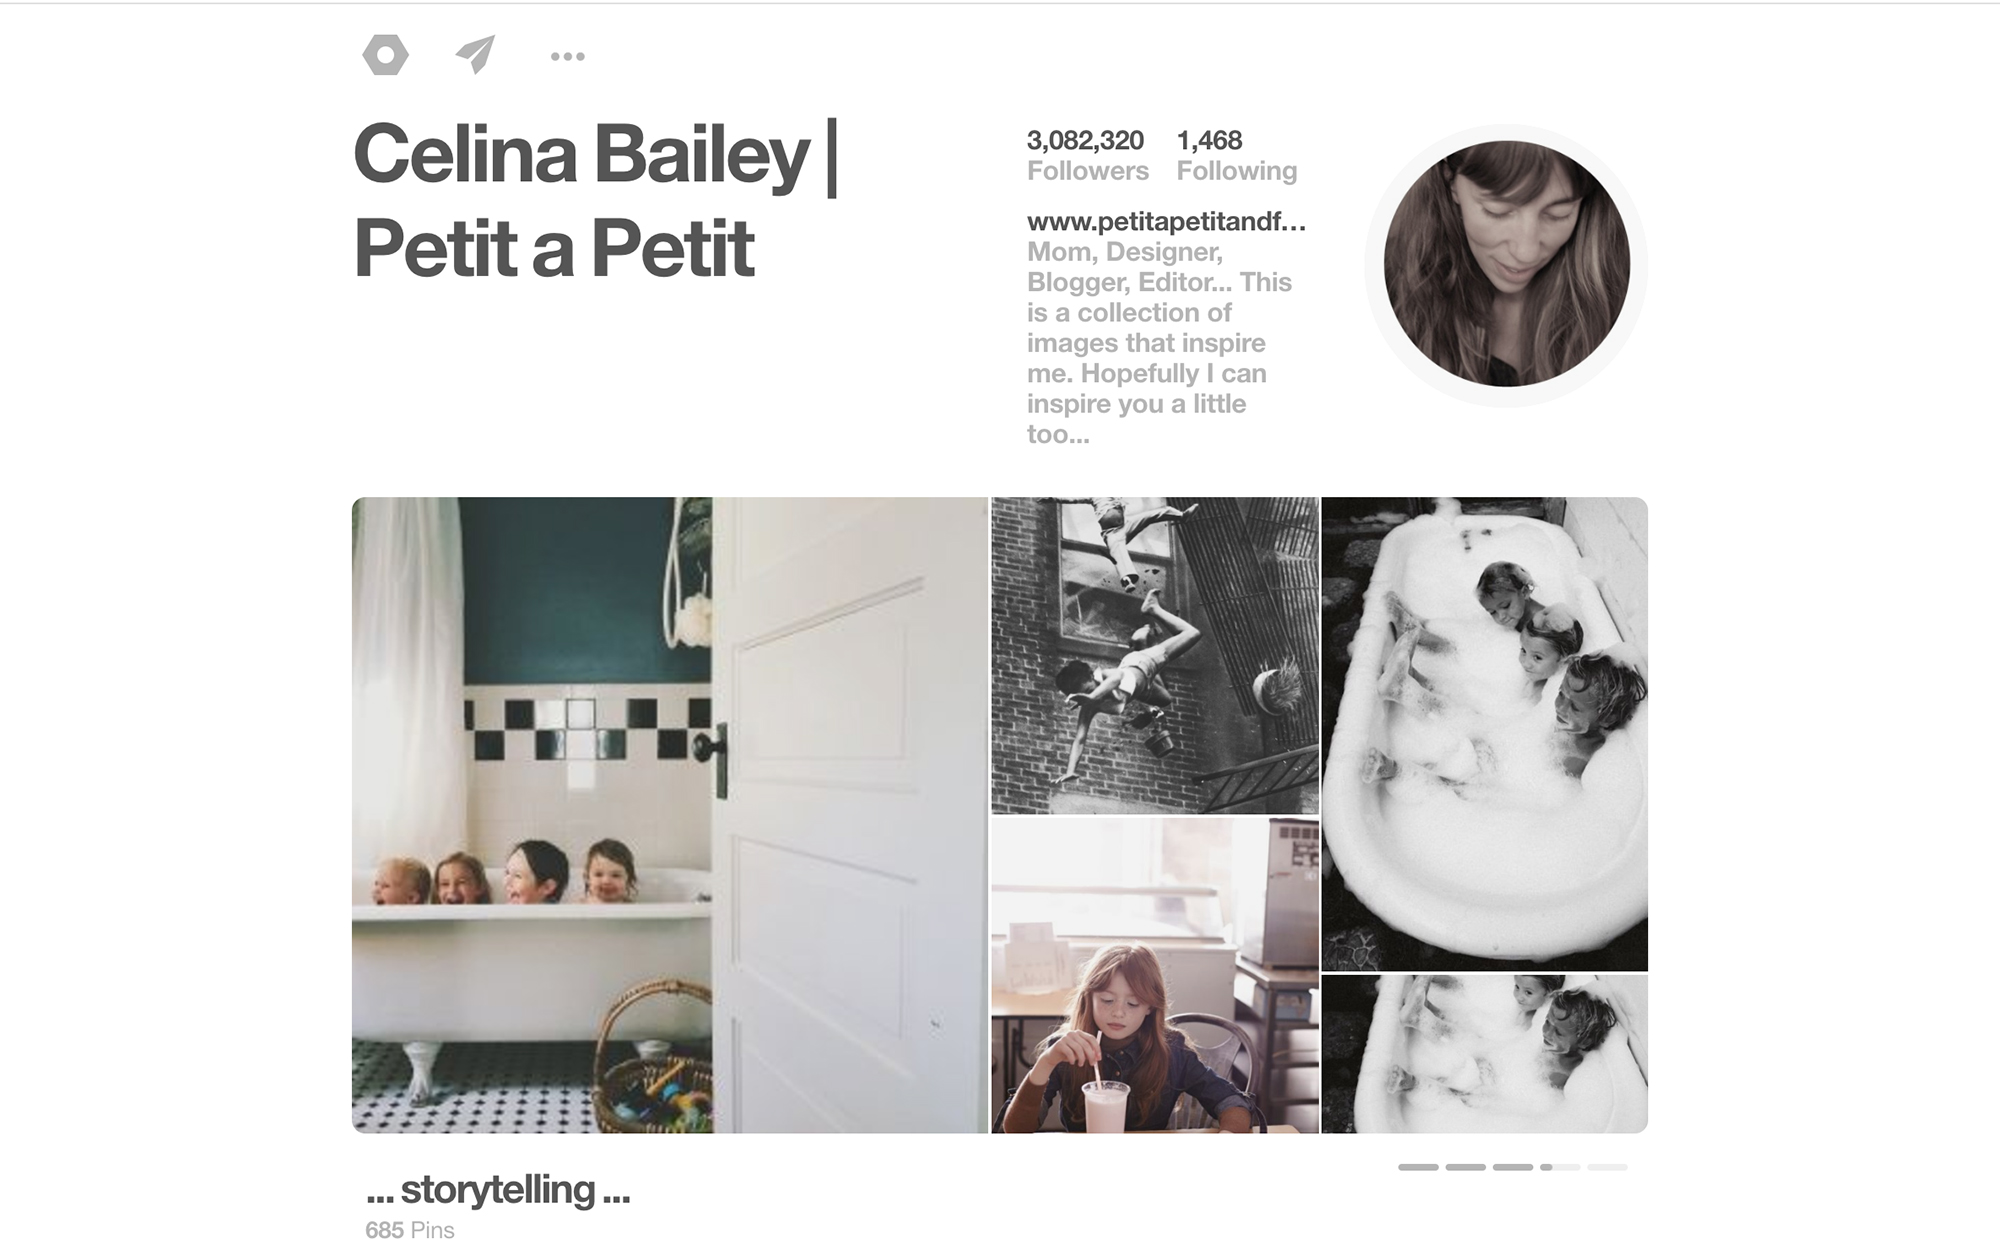
https://www.pinterest.com/celinab/storytelling/

So now that you have figured out what your target market is, it’s time to get some boards up keeping in mind all that not only inspires you but especially your potential clients too. As family documentary photographers, it is important to showcase photos that are aligned with our style. You could create a few boards that are in line with the type of sessions you offer, for example, one for in in-home sessions and one for maternity or baby sessions. Have a look at the different categories you offer on your website and create a board for each of them. Include other photographer’s work too, not only yours. This is a great way to showcase what your photography style is. Pinterest isn’t about only promoting our own products, it is important to mix it up. A good rule to follow is that for every 2 pins that come from your website, you should have about 8 that are inspirational or informative. These can be pins that you generate from websites yourself or even just repins. You can create a board with only your photos but also create some with the type of photography that inspires you. For example, create a board with your favorite storytelling images or more specifically of your favorite photographers.

https://www.pinterest.com/celinab/my-perspective/

I have all kinds of different boards with very specific themes like light, perspective, and movement, just to name a few. I want people to fall on my profile and be inspired by what they see and follow me. Chances are if they like what I am pinning, they will also like what I have to offer. One thing you want to avoid is pinning are images that aren’t in your style or that you don’t want to take. You need to keep true to your brand and image, just like when you are building your website. You can also share boards with things related to your photography business. For example, you could have a board with home decor and ideas on how to hang photos. You can also have one with your favorite gear or even tutorials on how to become a better photographer. Remember who your client is and cater to their likes all the while keeping it related to your business. Pinterest does really well during holidays, why not create a board with your favorite Christmas or Easter photos. You could even create mood boards to inspire your clients and add some great photos to the mix. Think outside the box and make your account exciting and fun.

https://www.pinterest.com/celinab/like-father-like-son/

Above is a mood board I did for father’s day. Now imagine one for a newborn or maybe a kids birthday; perhaps you offer Mother’s day mini sessions. The possibilities are endless.

Also, a great way to get good content to repin and pin is to create group boards with people who share the same style and aesthetics as you. Help each other out by pinning from each other’s websites or even just repinning images to some of your other boards. This is a great way to get more eyes on your work. Commenting helps too, just like on Facebook and Instagram. The more engagement the pins get, the more they will be seen.

Now let’s talk more specifically about the type of pins that work. Of course, beautiful imagery is a must, but don’t think it has to be all golden light and matching outfits. A lot of photos with genuine family life and real moments have gone viral. Photos with strong emotional cues, great colors or high contrast black whites that catch the eye are going to perform better. So when choosing which photos to share keep that in mind. Also,  you need to consider the size of your images. As documentary photographers, most of our images are 4X6, however, the optimal size to upload to Pinterest is 600px by 1200px. In general, even square photos do better than horizontal ones. So you have 3 options, keep the photos as is, crop the photo or make a collage. You could also try and get a few horizontal photo while shooting and keep them to share on your social media. Horizontal photos perform better on Instagram too and are great for sharing on Instagram stories too. Also, remember most people are using their phones to scroll through all of these platforms; so keep this in mind when deciding on which photos to share as they will be seen in a very small format. Don’t be afraid to tell people what to do and add a call to action in your captions on top of all your search words. You could also add your Url in the caption, as it is clickable and is a great reminder to go check it out.

Finally, don’t forget to let people know you are on Pinterest. Add the pin it button to your website and images. Create a post with inspiration boards like the one above; you can even add these boards to your newsletters. You can also share some of your favorite pins to Facebook or Twitter via the sharing option on Pinterest. Let your clients know you are on Pinterest and send them to see what it is that your style and vibe is all about.

Happy Pinning!

5 tips on shooting indoor with artificial light

Contributor Articles

For years I only made photographs during the last two hours of sunset. I never dared take out my camera at any other time. I went so far as to tell clients that “I’m a natural light photographer, and my preferred time to shoot is golden hour.” A.K.A I had no clue how to handle any other type of light be it morning light, harsh mid-day light or heaven forbid, artificial light. I tailored my style of photography around the only type of light I knew, and not surprisingly I hated my work. It was full of light airy images, beautiful smiles, and of course, glowing Sunkist light. I couldn’t connect with my work. I felt as though I was convincing myself that this was my style, when the truth was, I did not have the technical know-how to photograph what I wanted. Aside from my “alter-personality” portfolio, days and years were going by and I didn’t have a single photo of my family. Moments were missed, both amazing, sad, and the mundane everyday – but I was afraid to shoot inside. I then looked at the empty boxes of my family’s memories and decided it was time to document my family.

I knew I needed to learn how to photograph indoors, in any light. If you are afraid of getting your camera out I’m going to share 5 tips to give you inspiration and technical advice so that you can start making images inside when that sun goes down.

TIP #1: Look for the light, it’s there. 

This was one of my first stumbling blocks when getting inside and starting to shoot my family. I panicked as the sun went down because I saw fewer opportunities for photos. Inside shooting meant placing my subject next to a window or opened door. When beautiful light wasn’t streaming in from those sources, my camera was put away. What I failed to see, is that light can come from anywhere – I just wasn’t looking for it. When I finally opened my eyes, I saw that light can be used from an overhead fan light, a lamp, kitchen spot lights, opened refrigerators, the computer or TV, even a cell phone. With no light there’s no picture. We all know this. But there’s nowhere that says where that light must come from. Start looking at how an iPad can illuminate your child’s face, or how the lights inside a fish tank can light up your subject. There are so many sources of light inside our homes, we just have to actually “see” them.

TIP #2: Limit the number of light sources.

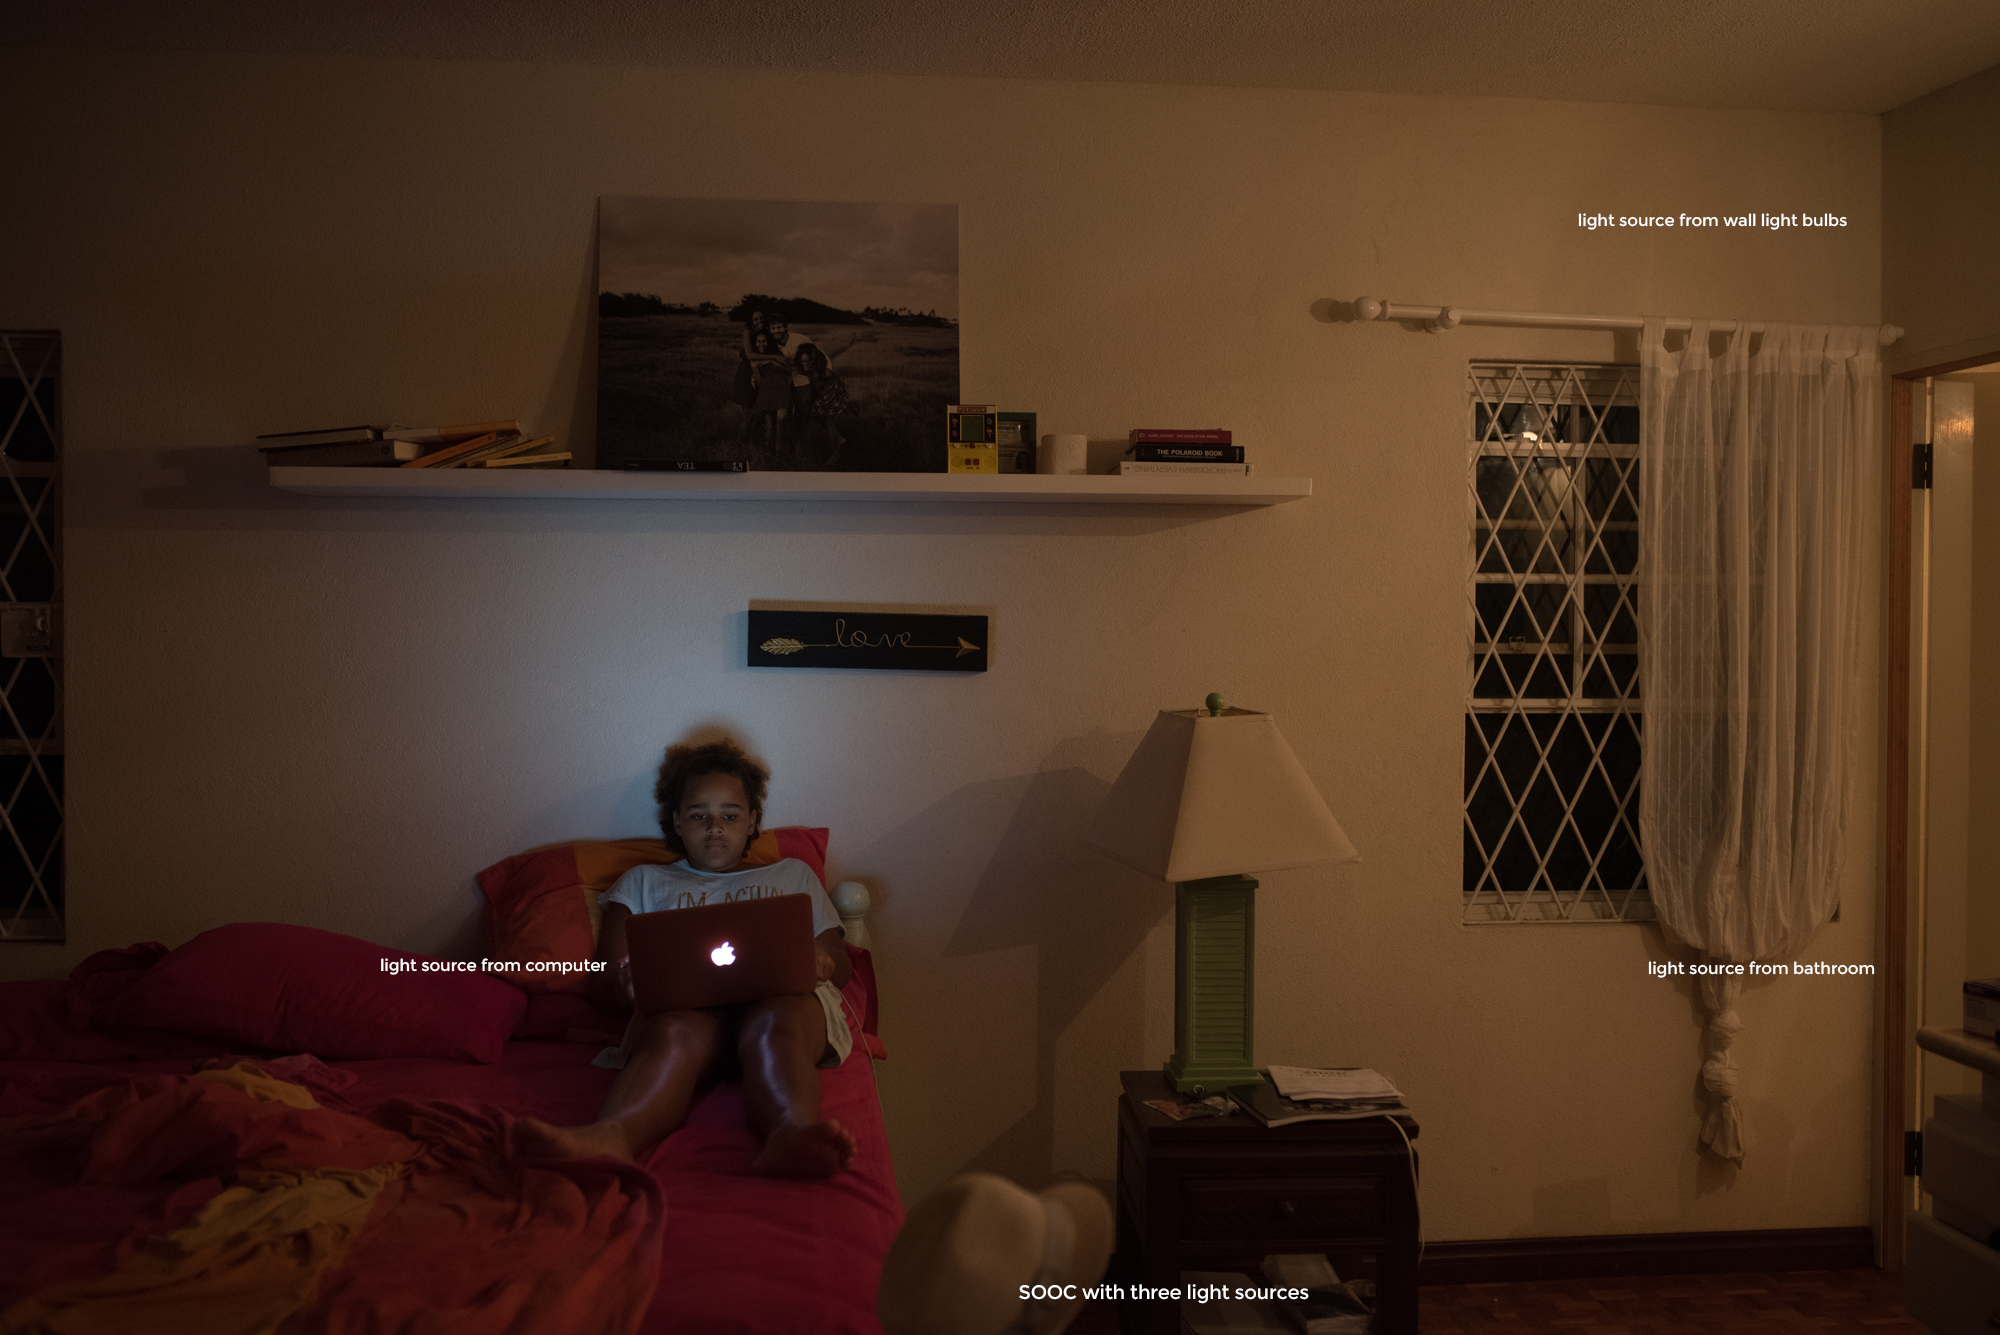
It’s hard to find beautiful artificial light indoors. You have to be able to embrace the difference between gorgeous natural light, and artificial light inside. Many times, you’ll see a scene where there will be multiple light sources, and this can completely throw off your exposure and your white balance. To increase the quality of your light in your image, use only one source of light. Turn off all surrounding lights and work with just one. Below is an example of this. When I walked into my room, Adi was sitting on the bed with the computer. I knew I wanted to capture this, but there was too much light around her coming in from the bathroom, and ceiling light. These lights were overpowering the computer light that was shining on her face, which was what I wanted to photograph.

This is the SOOC image. Camera right is the bathroom door with light coming in. Additionally, there are light bulbs on the wall, camera right.

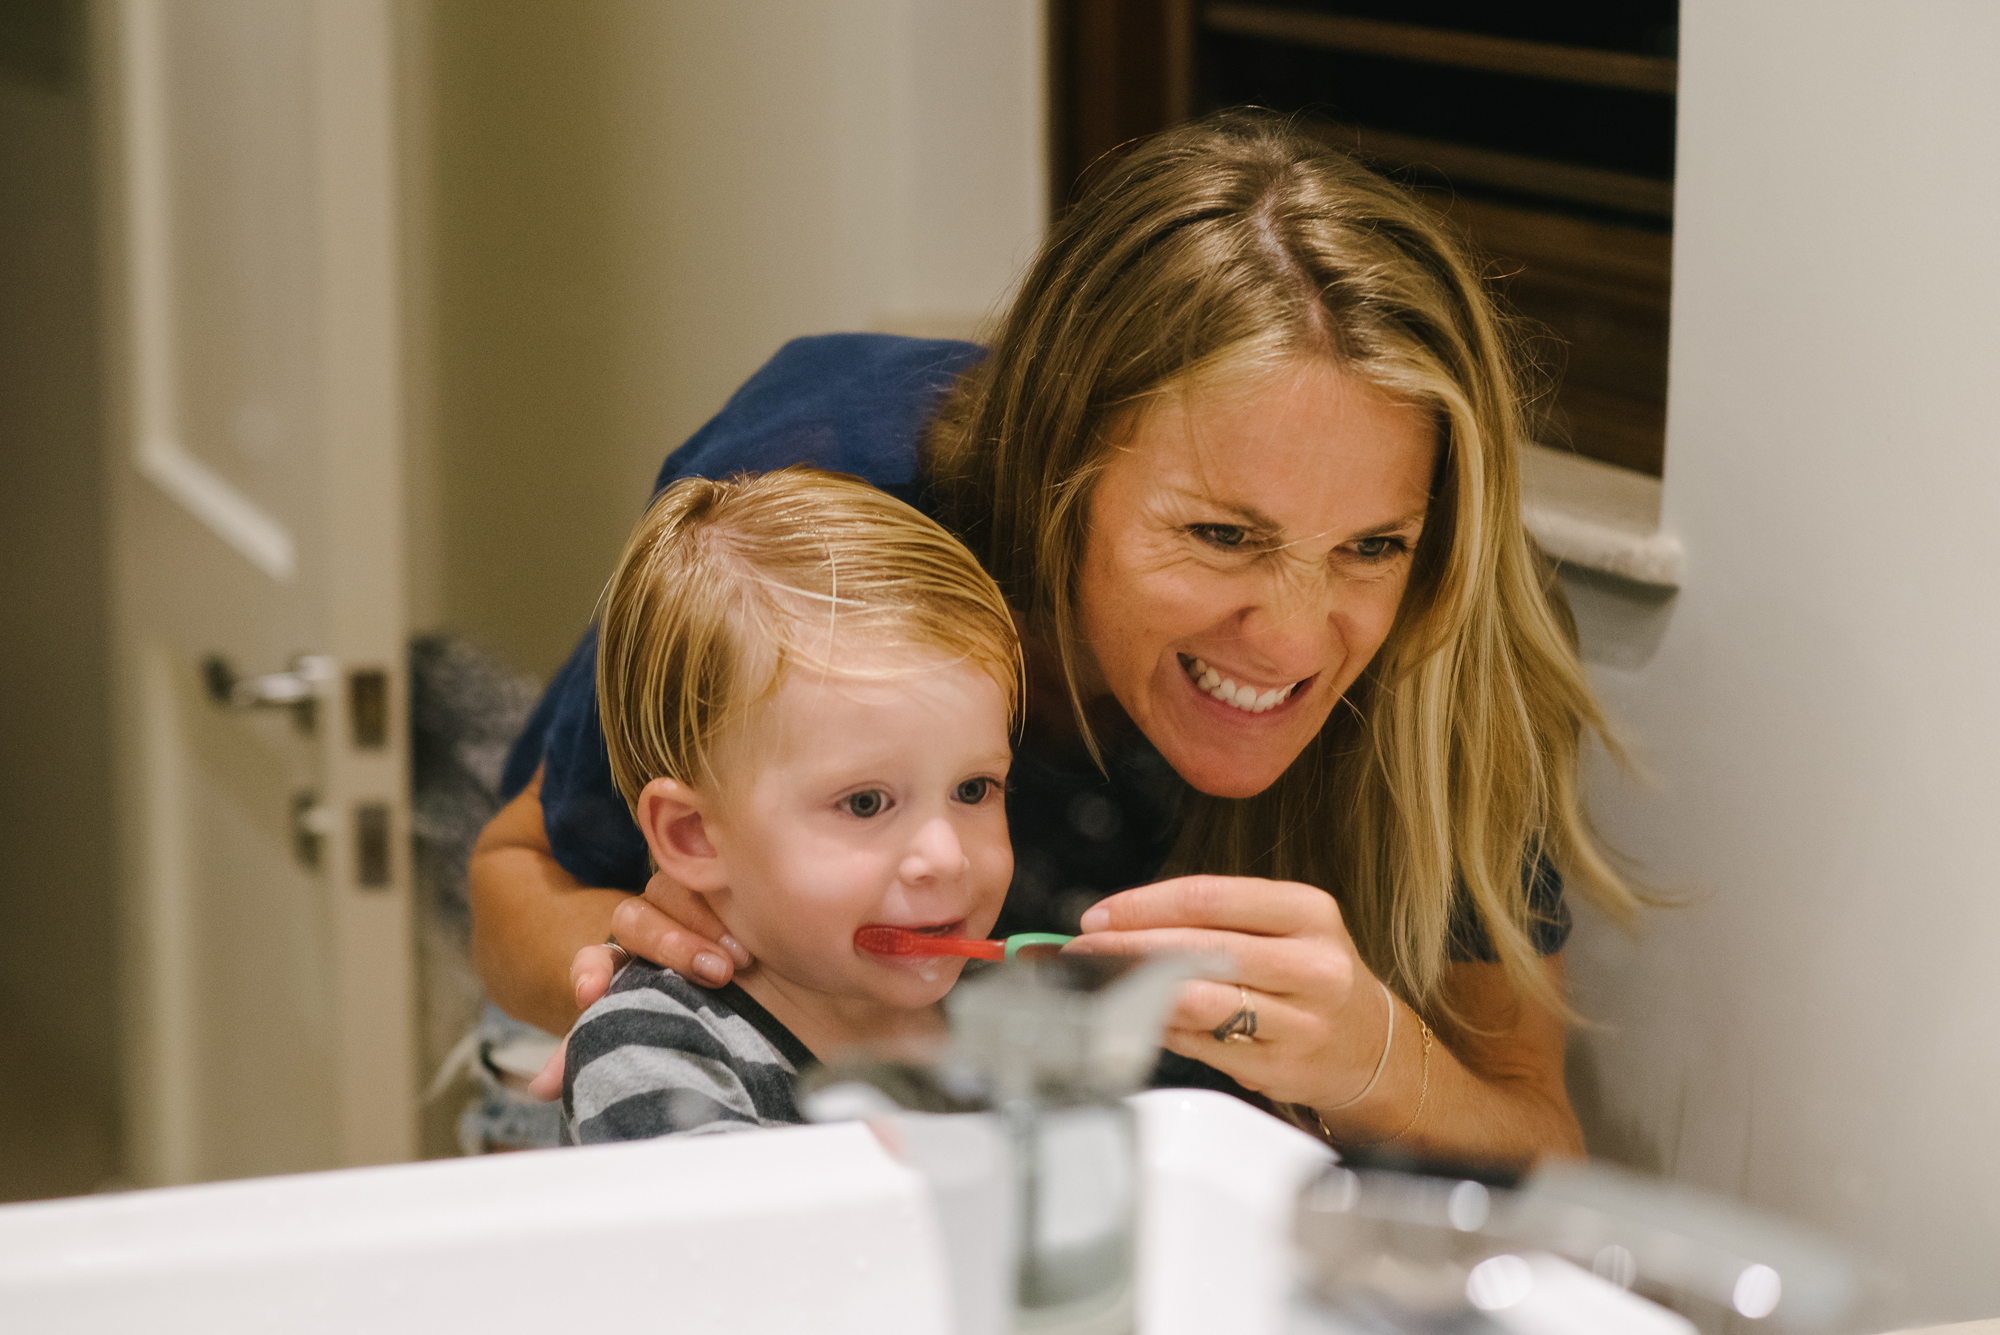

This is the final edit. I turned off all the lights, having the computer as my only source of light. The difference is astounding.

Keep in mind that there may be times when you have no control over the light in a room, and you cannot turn lights on or off when you are purely documenting your family or a client in their home.

TIP #3: Crank up your ISO

More than anything I don’t want unintentional blurry photos. To make sure of this, I try to keep my shutter at 1/160th or above. This means that I’m going to have to rely on my higher ISO capabilities to keep my shutter that fast when working with indoor light. I have the D750, which performs phenomenally well in low light situations. Many photographers are concerned with the grain in the image. However, if you are a documentary photographer, a lot of the shooting will be done in artificial light or extremely low light indoors. You must be comfortable with pushing your ISO. I’m very happy shooting at ISO 12,800 if the situation calls for it. The tricky thing with ISO in combination with indoor artificial light, is that you cannot use ISO to create light in your image. Find the light first, then hike up your ISO to enhance the light. If the grain is far too noisy, you can easily eliminate it in post production.

Tip #4: Open up your aperture

When working indoors with artificial light there will be times where you have to rely on your aperture to give you more light. The light can be so low from such a small light source, for example, that you will have open up your aperture to let more light into the scene. I will often use the 24mm 1.4 or 35mm 1.4 to let as much light into the frame as possible while adjusting for proper exposure. Be careful of the very narrow depth of field here when focusing. Your best bet would be to toggle and back button focus rather than focus and recomposing when using such a shallow depth of field in low light.

F/1.4, SS 1/30th, ISO6400
In this image, there was one small side light on the wall. I needed the widest aperture possible to illuminate this image.

TIP #5 Shoot in Raw

I cannot underscore enough the importance of shooting in RAW when photographing indoors. There are so many variables we cannot control that are easily fixed in post production only if we shoot in RAW format. Of course if you can nail exposure and white balance and create the image you want in camera, go for it. RAW files contain all the information needed, and we then have the chance to fix an image by having the ability to tweak exposure, highlights, shadows and so much more. Shooting JPG will limit your wiggle room when dealing with things like white balance which can be extremely challenging when photographing indoors with artificial light.

Images can be taken anywhere there is good light. Sometimes the sun makes us lazy, but when you train your eye to see and understand light, you can document truly spectacular moments indoors with the most unexpected light sources.


How To Incorporate Documentary Family Photography Into Your Traditional Family Portrait Business

Contributor Articles

Are you in love with documentary family photography and looking to take your business in that direction?  Many of us documentary family lovers fell in love with this genre because it reminds us why we got into photography in the first place. Photographing the moments! Yet somehow, market demands steered many of us into more posed work (which we can also love). But now what? How can we make the change without sacrificing everything? It can be very intimidating to make a shift in your business, but these 5 tips should help you make changes gently and effortlessly.

1. Remember: Your existing client base is your target market.

Never forget this. Your clients have great taste and a passion for photography. And people who value photography and art will be the first to understand and agree with your passion for documenting the everyday. It is a common misperception your clients will only value one type. The real problem is just that many don’t even know about it or they do but feel they only have a budget for one type of session. If you can solve these problems for them, you don’t need to go in search of an entirely new client base. They are already right in front of you!

2. Share what you love about it and they will love it too.

There are so many things to love about documentary family photography; it will be easier than you think to get your clients on board. All you have to do is start talking about how it is important, and it will naturally create the need. Use your newsletter, your social media accounts, and your website. To portfolio build you can reach out to a few of your clients who you think would be great for your portfolio. You can also take some self-portraits of you in the frame and let them know why you are passionate about being in your documentary images. It won’t take long for many of your clients to fall in love with this genre of family documentary just like you did.

3. Meet Both Needs.

One way to encourage your clients to get their feet wet with documentary sessions is to include regular portraits with the purchase. You can offer a discounted mini session of traditional portraits with any docu session or even incorporate traditional portraits into your docu session. One of my first portfolio building DITL sessions started with a few hours of home life and ended with a quick portrait session. It was perfect and is still one of my favorites. Get there while everyone is waking up, document the morning, and the getting ready for the day and shoot the portraits then! It’s a great compromise.

4. Position yourself as a leader in documentary photography.

If you love documentary family photography, chances are you love other types of documentary photography. Another way to increase bookings is to show your mastery of the style. Doing some births, baptisms, events, and even personal photojournalistic projects will increase consumer confidence and position you as a leader in this style. Your photographer friends in the community will think of you for these type of referrals and projects.

5. Forget the labels.

It’s a very true statement that “the riches are in the niches” and specializing helps narrow your target market. However, it’s also important to not get overly caught up in this. You don’t only have to offer DITL or births or lifestyle portraits. You can specialize in “family” and still be niched enough. Some of us need and thrive off variety and you will find there are clients who will love purchasing many different types of “family photography” from you. Best of luck to you!

Incorporating Video into your Documentary Shooting

Contributor Articles

If you’re anything like me, you’ve been using your camera almost daily, taking pictures for years and just ignoring that little video camera icon switch staring at you everyday. I finally decided it was time to make the switch over and learn video. I’m kicking myself for not doing it sooner. Incorprating video into your documentary shooting is such an easy transition. You’re already capturing your everyday life with stills and telling your story. By adding video to your stills you’ll be adding the voices, the giggles, the wobbly baby steps, and the kisses…you’ll be adding the motion that helps bring your stories and memories to life. You’ll use all the same techniques you already know for composition, capturing the moment, and using light

There are numerous online workshops and tutorials that all cover different aspects of shooting video from storytelling to business and brand films, and YouTube will definitely be your friend when you’re just getting started. But the best way to learn is to just practice and play around. Dig out your camera manual, have a little read, make the switch and start shooting!

A few tips below that I’ve learned along the way:

1. Getting Started

You’ll be shooting video in live view in manual mode. If you don’t normally shoot in manual, I’d recommend closing down a few stops than you normally shoot in to make it a bit easier, at least to start with. If you’re photographing clients, start shooting a few clips of video as well and if you have enough to work with surprise them with a fusion film. The more you practice swapping between stills and video, the easier it becomes.

2. Move your body! A lot!

Just like when you’re shooting stills, you’ll want to completely shoot the scene and will need to capture it from all different angles. Think about your compositions and then shoot wide, tight, from above, from below, straight on, pan up, pan down, pan sideways…just keep moving! When you put your clips together you don’t want the viewer to be watching your film from the same point of view the entire time, and to avoid the clips looking ‘jumpy’ vary the angles. Start with a clip shot straight on followed by one shot from above, then from below, then panning above, then back to straight on.

You don’t always need to follow the action. Let the action come in and out of your frame. Capture the little details to help set the scene and tell the story. A wide shot of the outside of the family house, the sun rays on the leaves, the rain falling, the bubble bath and kids towels, the pictures on the wall, the toys on the floor, the baby clothes hanging in the closet, the muddy knees, the baby toes, etc.

3. Music and Colour Grading

Finding the right music for your film is SO important. It sets the mood for your film and helps bring out the emotion in the viewer. I can literally spend hours listening to music to find the right one, and have gone as far as re-editing a film because I wasn’t convinced the music was right. A tip to make it less time consuming is to mark your favourites. This will give you a short list of songs that may not be right for one project but could be right for the next one. There are a number of music licensing sites, some with subscription based fees which are great if you’re making a lot of films and some that offer music for as little as a few dollars for personal films, so there is no reason to not find great music for your project.

There are also different options for editing from Premier Pro, to Final Cut Pro to iMovie, each with their own pros and cons and lots of tutorials online, so you’ll need to find what works best for you. I was already an Adobe Cloud user and could bundle my applications together, so I edit in Premier Pro. I do find the editing options a bit limited, so I colour grade and edit my clips in Lightroom first. It’s an extra step and can be time consuming depending on how much work you do to the clips, but it helps keep my clips looking consistent and I can match them to my style of photography as well.

4. Think about the story you want to tell

You’ll want your film to flow so you need to think about the story you want to tell. Have you shot an opening scene, and the middle or body of the story. How will it end? Sometimes I shoot my ending clips at the very beginning of the shoot and sometimes I’ll shoot a whole scene that doesn’t make into the final film. You’re the artist and the visual storyteller, so you need to decide on how to best tell the story.

5. Get Creative!

Try making a film in slow motion, or using a lensbaby or a macro lens for an entire film. Start a film project – one second a day for a year, a day in the life, daily breakfasts for a month. The options are endless, just get creative, start shooting and have fun!

Finding Your Creative Voice

Contributor Articles

In the world of photography, how do we find our own unique voice that will stand out amidst the sea of sameness? I wrestled with this question in the early years of my journey as an artist. I had so much to learn as far as business skills go and certainly technical skills too. So, I soaked up everything I could by looking at other photographers, industry magazines, what was getting the most likes and affirmation. But it all felt empty to me.

I knew what I was looking at was mostly mediocre, and though it might have been pretty it didn’t speak to me in any meaningful way. It wasn’t interesting and full of life. I wanted more than pretty pictures. I knew that I was drawn to something different than what I was seeing in the photography community, but I didn’t quite know how to translate what mattered to me, much less offer it to the world. When I first photographed a baby, I put the baby in a basket. I thought that was what you had to do when you photographed a newborn. But it wasn’t authentically me (or the baby, I might add). Luckily I was able to find a path that was more true to who I am and how I see the world. And now I’m passionate about refining my own creative voice and helping others do the same.

WHO ARE YOU? Matching who you are as an artist with who you are as a person

IN A SENSE YOUR PHOTOGRAPHS ARE YOUR AUTOBIOGRAPHY- DOROTHEA LANGE

In order to understand yourself as an artist, you must first know yourself. This requires some digging deep into your story. These questions are useful tools in the process of self-examination. Grab a few blank pieces of paper and some of your favorite pens for these exercises. Set a timer for 3 minutes for each of these. GO!

  • What are words that people use to describe you? (go ahead, ask them! But I recommend only asking people who really know you, not throwing it out on your social media platforms to the masses. Take it from me) What are words that you use to describe yourself?
  • What are areas of loss, sadness, crisis or tragedy in your life? Write down specific events or general themes that emerge.
  • What are your areas of interest and curiosity? Passions? Write them all down.
  • What are your goals and dreams?

Step back and take a look at these maps. What surprised you? What themes emerged? Where do these maps overlap? Circle the things that you want to explore more or that you feel strongly drawn to. Take some time to write about how these things influence you as an artist and what you might be motivated to do differently. Is there a personal project you might want to pursue based on themes that emerged?

Resources: I highly recommend the book Strengthsfinders. It is a detailed personality inventory that will determine the natural areas of strength in your personality. Focus on those strengths and let go of your weaknesses. You will grow fastest where you are naturally strong.

Another incredibly helpful tool is the book Start with Why. You can watch the TED talk here. This is such an important step for any artist or entrepreneur, or really for any endeavor. Things will become so much more clear if you have a strong sense of WHY you are doing it all in the first place, and then you can communicate that story through your art.

WHAT ARE YOU LOOKING AT? What you see is what you get!

YOU DON’T MAKE A PHOTOGRAPH JUST WITH A CAMERA. YOU BRING TO THE ACT OF PHOTOGRAPHY ALL THE PICTURES YOU HAVE SEEN, THE BOOKS YOU HAVE READ, THE MUSIC YOU HAVE HEARD, THE PEOPLE YOU HAVE LOVED. – ANSEL ADAMS

I believe that if you focus on becoming a more interesting person, you can’t help but become a more interesting artist. Where are you looking for inspiration? Who are you looking at for comparison? If all your photography heroes are on Instagram, you need new heroes.

  • Take a social media break for at least a week (you won’t die, I promise). You cannot make authentic work if you are copying what everyone else is doing and filling your creative tank with someone else’s vision. Stop looking at peers and following industry blogs. Notice how you feel without all that noise. You absorb what you see and can’t help but reflect that in your own work.
  • Look to the masters of your craft and learn what makes a truly GREAT photograph, not just one that gets a lot of likes. Here’s some ideas of where to start: Magnum contact sheets, photojournalists, Sally Mann, Sam Abell, Annie Leibovitz, Cig Harvey, Jessica Todd Harper, Alan Laboile, Vivian Maeier, Craig Semetko, Robert Frank, LensCulture, Cartier-Bresson, Elliot Erwitt, Nat Geo photographers, Petapixel.com, openculture.com (free art book downloads)
  • Look outside your genre to nourish your creative soul- some things that inspire me are Dutch masters, Caravaggio, Wes Anderson, Chef’s Table series on Netflix, Start with Why- Simon Sinek, Big Magic- Elizabeth Gilbert, The War of Art- Stephen Pressfield, The Artist’s Way- Julia Cameron, Fire Starter Sessions- Danielle LaPorte, Steal Like an Artist-Austin Kleon, The Untethered Soul, Brene Brown, documentaries, Norman Rockwell, erikkim.com, movies, music, nature, FOOD, TED Talks, cookbooks, poetry, podcasts

BE DARING, BE DIFFERENT, BE IMPRACTICAL, BE ANYTHING THAT WILL ASSERT INTEGRITY OF PURPOSE AND IMAGINATIVE VISION AGAINST THE PLAY-IT-SAFERS, THE CREATURES OF THE COMMONPLACE, THE SLAVES OF THE ORDINARY. – CECIL BACON

Finding your unique creative voice is a lifelong journey that will change as you change. You can cultivate and grow your own vision the more you invest in nourishing your soul through this process.

Just as nourishing your body with whole food takes more time and intention than eating convenience food without real nutrition in it, finding your voice takes time and intention, and sifting through a lot of noise. Most of all, remember  “A GOOD PHOTOGRAPHER MUST LOVE LIFE MORE THAN HE DOES PHOTOGRAPHY.” – JOEL STRASSER